Ready to dive into the wild world of mobile video editing? We’re pitting two giants against each other: KineMaster and CapCut. Both boast impressive animation and visual effects capabilities, but which one reigns supreme? This review will dissect their features, comparing their strengths and weaknesses for creating stunning animations and adding professional-grade visual flair to your videos. Get ready to discover which app best suits your skill level and creative vision!
From basic keyframe animations to complex compositing techniques, we’ll explore the ins and outs of both platforms. We’ll cover everything from ease of use and learning curves to the types of animation and visual effects each offers, and even compare their performance when tackling demanding projects. Whether you’re a seasoned animator or just starting out, this comprehensive comparison will help you choose the perfect tool for your next masterpiece.
KineMaster Animation Features Overview
KineMaster, while primarily known as a mobile video editor, offers surprisingly robust animation capabilities, making it a versatile tool for creating engaging visual content, especially for beginners and those on the go. Its keyframe animation system, although not as extensive as dedicated animation software, provides enough flexibility to produce impressive results. Let’s delve into the specifics.
Keyframe Animation Capabilities in KineMaster
KineMaster’s keyframe animation works by setting properties (like position, scale, opacity, rotation) at specific points in time (keyframes). Between these keyframes, KineMaster interpolates the changes, creating smooth animation. You can add as many keyframes as needed for precise control over your animation. This allows for complex movements and effects, even within the constraints of a mobile app. The interface is intuitive, making it easy to add, edit, and delete keyframes directly on the timeline.
Creating 2D Animations with KineMaster’s Tools
Creating 2D animations in KineMaster involves importing your assets (images, illustrations, or even video clips) and then applying keyframes to control their movement and transformations. You can animate individual layers independently, allowing for complex interactions between different elements. For instance, you could animate a character walking across the screen while simultaneously animating the background to create a sense of parallax. The layering system allows for easy management of numerous animated elements without confusion.
Examples of Animation Effects Achievable in KineMaster
KineMaster allows for a wide range of animation effects. Simple effects like scaling, rotation, and translation are easily achieved through keyframes. More advanced effects can be created by combining multiple animations and using KineMaster’s built-in transitions. For example, you could create a “zoom-in” effect by combining scaling and translation keyframes, or a “fade-in/fade-out” effect using opacity keyframes. The use of multiple layers and blending modes allows for creative effects such as layering images to create depth or transparency. Imagine a character walking behind a tree; this effect is achievable through layering and careful animation of the character’s position.
Step-by-Step Tutorial: Animating a Simple Character
Let’s animate a simple bouncing ball.
1. Import Assets: Import an image of a ball into KineMaster.
2. Create a Layer: Add the ball image to a new layer on the timeline.
3. Add Keyframes: Add a keyframe at the beginning of the timeline. Set the ball’s position at the bottom of the screen.
4. Add Keyframes (cont.): Add a keyframe mid-timeline. Set the ball’s position higher up, slightly offset from the initial position.
5. Add Keyframes (cont.): Add a keyframe at the end of the timeline. Set the ball’s position back to the bottom.
6. Adjust Timing: Adjust the timing of the keyframes to control the speed and bounce of the ball. Experiment with easing functions (if available in your version of KineMaster) to fine-tune the animation’s smoothness.
7. Preview and Refine: Preview the animation and adjust keyframes as needed until you achieve the desired bounce effect.
Comparison of KineMaster’s Animation Features to Industry-Standard Software
| Feature | KineMaster | Adobe After Effects | Toon Boom Harmony |
|---|---|---|---|
| Keyframe Animation | Basic keyframe animation for position, scale, rotation, opacity | Advanced keyframe animation with extensive control over properties | Powerful keyframe animation with specialized tools for 2D animation |
| Layer Management | Supports multiple layers with basic blending modes | Robust layer management with advanced features like pre-compositions | Highly sophisticated layer management optimized for animation workflows |
| Effects and Transitions | Limited built-in effects and transitions | Vast library of effects and transitions, with extensive customization options | Specialized tools for creating 2D animation effects and transitions |
| Ease of Use | Intuitive interface, suitable for beginners | Steeper learning curve, requires more technical expertise | Specialized interface, requires training and experience |
CapCut Animation Features Overview
CapCut, the popular mobile video editing app, boasts a surprisingly robust set of animation tools, easily accessible even for beginners. While not as feature-rich as professional software like After Effects, its intuitive interface and streamlined workflow make it a powerful tool for creating engaging animated content, particularly for social media. This section will explore CapCut’s animation capabilities, comparing them to KineMaster and highlighting its ease of use.
Ease of Use and Intuitive Interface
CapCut’s strength lies in its simplicity. The animation tools are integrated seamlessly into the main editing timeline, requiring minimal technical expertise to use. Keyframe animation, for instance, is handled with a simple drag-and-drop interface, allowing users to adjust object position, scale, and opacity with ease. This contrasts with KineMaster, which while offering more advanced features, presents a steeper learning curve. The visual feedback in CapCut is excellent, providing immediate previews of animations as they’re created. This allows for quick iterative design and refinement.
Examples of Complex Animations Created Using CapCut
While CapCut might not be suitable for highly complex, 3D-animated projects, it’s surprisingly capable of producing sophisticated 2D animations. Imagine a simple logo animation: a logo smoothly appearing on screen, rotating slightly, and then fading out with a subtle glow effect. All of this is achievable within CapCut using its keyframe animation tools and built-in effects. Another example could be a short animated sequence showcasing a character walking across the screen. Using keyframes to adjust the character’s position and possibly adding a slight bounce to the character’s movement through carefully placed keyframes creates a more natural and dynamic feel. Even more intricate animations, such as text effects with elaborate transitions and subtle movements, are readily achievable through the app’s features.
Creating a Short Animated Sequence in CapCut
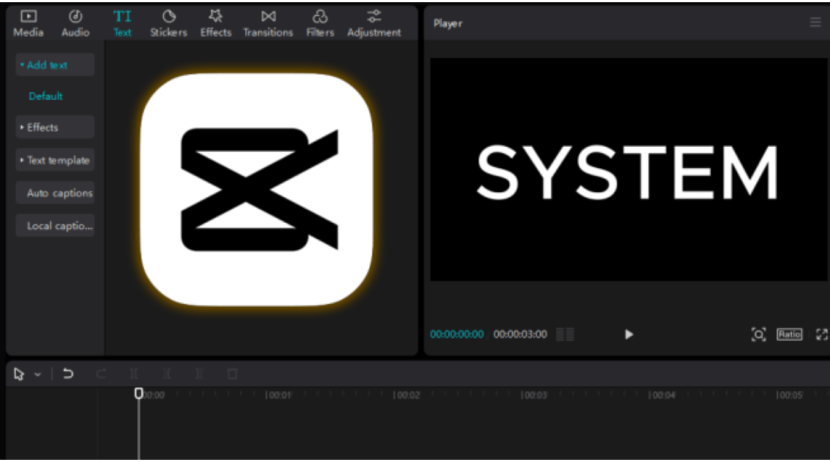
Let’s create a simple animation: a square moving across the screen. First, add a square shape using CapCut’s built-in shape tool. Then, select the square layer in the timeline. Find the animation tab, which typically includes options for position, scale, rotation, and opacity. By placing keyframes at various points along the timeline and adjusting the square’s position at each keyframe, you’ll create the animation of the square moving across the screen. You can further enhance the animation by adding keyframes to control the square’s opacity or scale over time, creating a fade-in or scaling effect. The entire process is remarkably straightforward and intuitive.
Comparison of CapCut and KineMaster Animation Timelines
CapCut’s timeline is linear and straightforward, focusing on ease of use. It prioritizes a clean and uncluttered interface. KineMaster’s timeline, on the other hand, offers more layers and advanced features, allowing for more complex projects but with a more complex interface. CapCut’s simpler timeline makes it ideal for quick animations and social media content, while KineMaster’s is better suited for larger, more intricate projects requiring more control and precision.
Categorization of CapCut Animation Features
The following list categorizes CapCut’s animation features:
CapCut provides a range of animation tools that are easily accessible and integrated into the main editing workflow. These tools cover a variety of animation types, allowing for considerable creative flexibility within the app’s limitations.
| Feature Type | Specific Features |
|---|---|
| Keyframe Animation | Position, Scale, Rotation, Opacity, Color |
| Text Animation | Entrance and exit animations, text effects, character animation |
| Object Animation | Movement, scaling, rotation, and opacity adjustments for images and shapes |
| Pre-set Animations | Quick animations and transitions that can be applied with minimal effort |
KineMaster Visual Effects Capabilities
KineMaster boasts a surprisingly robust collection of built-in visual effects, making it a powerful tool for enhancing videos beyond basic editing. These effects range from subtle color adjustments to dramatic transformations, allowing users to achieve professional-looking results without needing external software. Understanding these effects and how to apply them is key to unlocking KineMaster’s full potential for animation and visual effects.
KineMaster’s visual effects are applied through a straightforward, intuitive interface. After importing your footage, you’ll find the effects options within the editing timeline. The process generally involves selecting a clip, tapping the effects icon, browsing the available options (categorized for easy navigation), and then adjusting the intensity or parameters of the chosen effect. Most effects offer customizable settings, allowing for fine-tuned control over the final result.
Built-in Visual Effects
KineMaster offers a variety of visual effects, including color adjustments (brightness, contrast, saturation, etc.), color filters (sepia, black and white, etc.), blur effects (Gaussian blur, box blur), and various stylistic effects (like vignette or glitch). These are easily accessible and offer a quick way to significantly alter the mood and look of your video. For example, a simple Gaussian blur can be used to soften backgrounds, drawing attention to the main subject. Similarly, a color filter can quickly set a specific tone or atmosphere.
Chroma Keying and Compositing Techniques
Chroma keying, or green/blue screen removal, is a powerful compositing technique readily available in KineMaster. The process involves selecting the color to be removed (usually green or blue), adjusting the tolerance to precisely target that color, and then layering the keyed footage over another background. The precision of the key depends on the quality of the original footage and the accuracy of the settings. For example, a poorly lit green screen can result in a less-than-perfect key, leaving green fringes around the subject. However, with careful lighting and precise adjustments, KineMaster’s chroma keying tool delivers professional-looking results. Beyond chroma keying, KineMaster allows for layering and blending different video clips, using various blend modes to create unique visual effects and compositing shots.
Importing and Using External Visual Effects
While KineMaster offers a solid range of built-in effects, it also allows for the import of external visual effects. This usually involves importing video clips containing pre-rendered effects or using still images as overlays. The process is straightforward: import the external asset, place it on the timeline, and adjust its position, scale, and opacity to integrate seamlessly with your project. This opens up possibilities for using effects created in other software or incorporating custom assets. For instance, a user might create a fire effect in a separate program and then seamlessly integrate it into a KineMaster project.
Example Scene Enhanced with Visual Effects
Imagine a scene of a person standing in front of a plain white background. Using KineMaster, we replace the white background with a vibrant cityscape using chroma keying. Then, we add a subtle Gaussian blur to the cityscape to make the person stand out more. Finally, we add a warm color filter to give the scene a nostalgic feel. The final result is a dramatically different scene—a seemingly simple video clip transformed into a captivating visual narrative through the strategic use of KineMaster’s visual effects. The person now appears to be standing amidst the bustling city, a feat accomplished entirely within KineMaster’s intuitive interface.
CapCut Visual Effects Capabilities
CapCut, despite its reputation as a user-friendly video editor, packs a surprising punch when it comes to visual effects. While not as extensive as KineMaster’s offering, CapCut’s selection is carefully curated, focusing on effects easily accessible and applicable to a broad range of projects, from casual social media content to more polished short films. Its strength lies in its intuitive interface and the speed with which users can apply and customize these effects.
CapCut’s visual effects library is noticeably different from KineMaster’s. KineMaster boasts a larger, more technically advanced toolkit, catering to professional-level editing needs. CapCut, on the other hand, prioritizes ease of use and quick results. This makes it ideal for users who want impactful visual enhancements without needing a deep understanding of complex editing techniques. While KineMaster might offer more granular control, CapCut shines in its simplicity and speed.
Visual Effects Range and Application
CapCut offers a variety of visual effects, including filters, overlays, and transitions. Filters alter the overall color grading and mood of a clip, ranging from subtle enhancements to dramatic stylistic changes. Overlays add extra visual elements, like light leaks or particle effects, to create atmosphere or emphasize specific moments. Transitions smoothly connect different clips, offering a range of options from simple fades to more dynamic wipes and zooms. These effects can be easily applied by selecting a clip, tapping the “Effects” tab, and browsing the available options. Many effects offer adjustable parameters, allowing users to fine-tune their intensity and appearance.
Customizing Visual Effects in CapCut
Applying and customizing visual effects in CapCut is remarkably straightforward. After selecting an effect, users can usually adjust its intensity, duration, and blending mode. For example, a filter’s intensity can be reduced to create a more subtle effect, or its duration can be adjusted to apply it only to specific portions of a clip. Blending modes affect how the effect interacts with the underlying video, allowing for creative combinations and unique looks. This intuitive approach minimizes the learning curve, empowering even novice users to achieve impressive results.
Achieving Specific Visual Styles with CapCut Filters and Effects
To illustrate, let’s consider creating a vintage-inspired video. By applying a “film grain” filter, followed by a slight color desaturation and a warm color tone adjustment, we can immediately achieve a classic, nostalgic look. Adding a light leak overlay can further enhance the effect, giving the video a slightly faded, romantic feel. Alternatively, a futuristic aesthetic could be achieved through the use of neon-colored filters, combined with glitch effects and dynamic transitions. The key is to experiment and combine different effects to create the desired visual style.
Example Video Showcase: A Day in the City
Imagine a short video showcasing a day in a bustling city. The video opens with a vibrant, fast-paced montage of city life, utilizing a high-contrast filter to emphasize the energy and vibrancy. A quick transition using a stylish zoom effect connects this section to a more tranquil scene at sunset. Here, a warm, golden filter is applied, along with a subtle light leak overlay to evoke a feeling of calm and serenity. The final shot, a nighttime cityscape, utilizes a cool-toned filter and a subtle particle effect overlay to add a touch of magic and mystery. The entire video seamlessly blends these diverse effects to create a cohesive and visually compelling narrative, showcasing CapCut’s ability to transform a simple collection of clips into a polished and visually engaging short film.
Comparative Analysis: Animation Workflow
KineMaster and CapCut, while both offering animation capabilities, cater to different user needs and skill levels. Their workflows differ significantly, impacting the ease of creating animations and the complexity of projects they can handle. This comparison focuses on workflow aspects to help you choose the right tool for your animation needs.
Animation Workflow Differences
KineMaster presents a more traditional video editing interface, offering a robust timeline-based approach to animation. Users can meticulously control keyframes, layers, and animation parameters. CapCut, on the other hand, leans towards a more streamlined, intuitive experience, often utilizing pre-set animations and simpler keyframe controls. This difference makes KineMaster better suited for precise, complex animations while CapCut excels in quick, simpler projects.
Ease of Use and Learning Curve
CapCut’s simplified interface and pre-set animations make it significantly easier for beginners to grasp. Its intuitive drag-and-drop functionality and straightforward keyframe controls allow for quick learning and immediate animation creation. KineMaster, with its more advanced features and timeline-based workflow, demands a steeper learning curve. While offering unparalleled control, mastering its functionalities requires more time and practice, making it better suited for intermediate or advanced users.
Supported File Formats for Animation
Both KineMaster and CapCut support a variety of common video and image formats. However, their specific support for animation-specific formats may vary. KineMaster generally handles a broader range of professional formats, including those commonly used in advanced animation pipelines. CapCut, being more geared towards casual users, may have slightly more limited compatibility, primarily focusing on widely accessible formats like MP4 and GIF. A detailed comparison would require checking the latest specifications on their respective websites.
Performance with Complex Animations
| Feature | KineMaster | CapCut | Notes |
|---|---|---|---|
| Handling Multiple Layers | Excellent; manages many layers efficiently. | Good; performance can degrade with a large number of layers. | KineMaster’s timeline excels in managing complex layering. |
| Keyframe Interpolation | Offers various interpolation methods for precise control. | Provides basic interpolation; limited advanced options. | KineMaster provides greater flexibility in animation smoothness. |
| Rendering Time | Can be longer for complex animations. | Generally faster rendering, especially for simpler animations. | Rendering time is directly related to project complexity and device processing power. |
| Stability with Complex Projects | Generally stable, even with demanding projects. | May experience occasional instability with very complex projects. | This is influenced by device specifications and project optimization. |
Comparative Analysis: Visual Effects Workflow
KineMaster and CapCut, while both powerful mobile video editors, offer distinct approaches to visual effects. This comparison delves into their workflows, highlighting strengths and weaknesses to help you choose the best app for your VFX needs. We’ll examine the versatility, efficiency, quality, control, and ease of use in applying and adjusting visual effects within each application.
The visual effects workflow in both apps involves selecting a clip, accessing the effects library, choosing an effect, and adjusting its parameters. However, the specifics of this process, the range of effects available, and the level of control offered differ significantly.
Visual Effects Versatility and Efficiency
KineMaster boasts a more extensive library of visual effects, including chroma keying, color grading tools, and advanced blending modes, catering to a wider range of projects. Its multi-layer timeline allows for complex VFX compositions, enabling users to layer effects and adjust their opacity, blending modes, and other parameters independently. This offers greater control and allows for intricate visual effects. CapCut, while possessing a simpler interface, focuses on user-friendly, pre-set effects, making it quicker for simple edits. Its efficiency lies in its streamlined workflow, ideal for quick edits and social media content. However, this simplicity comes at the cost of the granular control offered by KineMaster. For instance, KineMaster’s chroma keying offers more precise control over spill suppression and edge feathering than CapCut’s simpler implementation.
Visual Effects Quality and Range
The quality of visual effects in both apps is generally good, but differences exist. KineMaster tends to produce higher-quality results, especially with complex effects like chroma keying and color grading, due to its more powerful processing capabilities and a wider array of adjustable parameters. CapCut’s effects are generally suitable for quick edits and social media, but they might lack the finesse and precision achievable with KineMaster for professional-level work. For example, the blur effects in KineMaster allow for more precise control over the blur radius and intensity compared to CapCut’s more limited options. CapCut excels in its quick and easy-to-use filters and transitions, often suitable for stylistic choices over highly detailed VFX.
Control Over Visual Effect Parameters
KineMaster provides significantly more control over visual effect parameters. Users can fine-tune almost every aspect of an effect, from opacity and blending modes to specific color adjustments and keyframing. This level of control is crucial for achieving precise and professional-looking results. CapCut offers fewer adjustable parameters, often relying on pre-set values. While this simplifies the process, it limits creative flexibility. Consider, for instance, the ability to keyframe parameters over time. KineMaster allows for precise animation of effect parameters, creating dynamic and evolving visual effects. This is a feature less readily available in CapCut.
Ease of Applying and Adjusting Visual Effects
The ease of use varies greatly between the two apps. The following points summarize the differences in applying and adjusting visual effects:
- KineMaster: While offering extensive control, KineMaster’s interface can feel overwhelming for beginners. Finding and applying specific effects might require some navigation, but the detailed controls are powerful once mastered. Adjusting parameters often involves multiple steps and precise adjustments.
- CapCut: CapCut prioritizes simplicity. Applying effects is intuitive and straightforward. Adjustments are generally made with simple sliders and pre-sets, making it extremely user-friendly, even for novices. However, this simplicity means less control over fine details.
Q&A
Can I import custom assets (fonts, sounds, etc.) into both apps?
Yes, both KineMaster and CapCut support importing custom assets, although the specific file formats supported may vary.
What about 3D animation capabilities?
Neither app is primarily designed for 3D animation. While you might achieve basic 3D effects through workarounds, dedicated 3D animation software is recommended for complex 3D projects.
Are there any limitations on video length or resolution?
Both apps have limitations depending on your device’s capabilities and subscription status (if applicable). Check the apps’ specifications for details.
Which app is better for collaborative projects?
KineMaster generally offers better collaboration features, but both apps allow for exporting and sharing projects easily.