YouTube Shorts are exploding, and you’re ready to join the party! But with a million video editing apps vying for your attention, choosing the right one can feel overwhelming. This showdown pits two popular contenders, KineMaster and CapCut, against each other to help you decide which app reigns supreme for crafting killer Shorts. Get ready for a head-to-head comparison that dives deep into ease of use, editing power, export options, and more – ultimately helping you pick the perfect tool to elevate your short-form video game.
We’ll be exploring everything from the initial learning curve and intuitive interface design to advanced features like keyframing and color grading. We’ll also compare the range of effects and transitions available, discuss performance on different devices, and analyze the cost implications of each app. By the end, you’ll have a clear understanding of which app aligns best with your skills and goals, empowering you to create captivating YouTube Shorts that stand out from the crowd.
Ease of Use and Interface
Choosing between KineMaster and CapCut for YouTube Shorts often boils down to personal preference, but a significant factor is the ease of use and the intuitiveness of each app’s interface. Both offer powerful editing capabilities, but their approaches to presenting those capabilities differ considerably, impacting the learning curve for beginners.
CapCut, with its clean and minimalist design, generally boasts a gentler learning curve. KineMaster, on the other hand, packs in a multitude of features, resulting in a more complex interface that can initially feel overwhelming. This doesn’t mean KineMaster is bad; it simply caters to a more experienced or ambitious editor.
Interface Comparison and Beginner Learning Curve
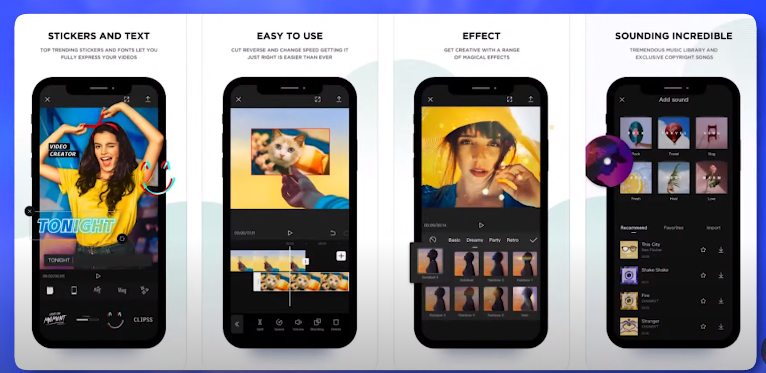
CapCut’s interface is remarkably straightforward. The tools are clearly labeled and logically arranged, making it easy to find what you need. The timeline is simple to understand, and the overall workflow feels very streamlined. Beginners can typically pick up the basics within minutes, creating simple edits almost immediately. CapCut’s tutorials are also readily available and exceptionally clear, further reducing the learning curve.
KineMaster’s interface, while powerful, is denser. Its multitude of features and layers can be daunting for new users. The sheer number of tools and options might feel overwhelming at first. However, with a little patience and exploration, users can master the interface. While KineMaster offers more in-depth tutorials, navigating through them to find the information needed for a specific task can take more time than CapCut’s simpler tutorials.
Step-by-Step Guide: Creating a Simple YouTube Short
Creating a simple YouTube Short using both apps involves similar basic steps, but the interface and tool access vary.
CapCut
- Import your video clips and photos.
- Arrange clips on the timeline.
- Add transitions between clips (easily accessible at the bottom).
- Add text overlays (simple text tool easily accessible).
- Add music or sound effects (pre-loaded options or upload your own).
- Adjust video speed and add filters (easily accessible controls).
- Export your video.
KineMaster
- Import your video clips and photos (multiple import options).
- Arrange clips on the timeline (multiple layers available).
- Add transitions (extensive library, but requires navigating layers).
- Add text overlays (multiple customization options, potentially complex).
- Add music or sound effects (multiple tracks, advanced audio controls).
- Adjust video speed and add filters (extensive options, require navigating layers and menus).
- Export your video (multiple export options).
Intuitive Interface Comparison
| Feature | CapCut | KineMaster |
|---|---|---|
| Ease of Navigation | Highly intuitive, simple layout | Steeper learning curve, more complex layout |
| Tool Accessibility | Tools clearly labeled and easily accessible | Many tools require navigating menus and layers |
| Timeline Management | Simple, straightforward timeline | Multi-layered timeline, more complex to manage |
| Overall Intuitiveness | Beginner-friendly, very easy to learn | Powerful but requires more time to master |
Editing Features and Capabilities
Choosing between KineMaster and CapCut for your YouTube Shorts often boils down to the specific editing features each offers. Both apps provide a robust set of tools, but their strengths lie in different areas. Let’s dive into a detailed comparison of their editing capabilities. We’ll explore the core features, advanced functionalities, and then delve into a direct comparison of their video and audio editing tools.
Both KineMaster and CapCut offer a wide array of editing features designed to streamline the YouTube Shorts creation process. However, their approaches and the depth of their capabilities differ significantly, catering to various editing styles and skill levels.
Key Editing Features
The following lists highlight the core editing features available in KineMaster and CapCut. These basic tools form the foundation of any video editing project, and their implementation and user-friendliness are crucial for a smooth workflow.
- KineMaster: Trimming, splitting, merging clips; adding text, stickers, and transitions; chroma key; speed control; reverse playback; multi-layer editing; voiceovers; subtitle support.
- CapCut: Trimming, splitting, merging clips; adding text, stickers, and transitions; speed control; reverse playback; text animation; audio mixing; basic color correction.
Advanced Editing Capabilities
Beyond the basic tools, advanced editing capabilities set apart professional-grade editors from simpler applications. These features allow for finer control and creative expression, transforming a simple video into a polished, engaging short.
- KineMaster: KineMaster shines with its advanced features. It offers robust keyframing for precise control over animations, transitions, and effects. Its color grading tools allow for detailed adjustments to color balance, saturation, and contrast. The audio mixing capabilities are also quite extensive, enabling users to add multiple audio tracks, adjust volume levels, and apply audio effects.
- CapCut: CapCut’s advanced features are more streamlined but still impressive for a free app. While keyframing is available, it’s less extensive than KineMaster’s. Color grading options are more limited, focusing on pre-set filters and basic adjustments. Audio mixing is possible, but it lacks the granular control offered by KineMaster.
Video and Audio Editing Tool Comparison
This table directly compares the video and audio editing tools of KineMaster and CapCut, highlighting their similarities and differences. Note that features can be added or updated over time by the developers.
| Feature | KineMaster | CapCut | Notes |
|---|---|---|---|
| Trimming/Splitting | Precise, multi-layer support | Precise, single layer focus | Both offer excellent precision |
| Transitions | Wide variety, customizable | Good selection, simpler customization | KineMaster offers more advanced options |
| Keyframing | Extensive, for multiple parameters | Available, but less comprehensive | KineMaster provides more granular control |
| Color Grading | Advanced tools, fine-grained control | Basic adjustments, preset filters | KineMaster allows for professional-level color correction |
| Audio Mixing | Multiple tracks, effects, equalization | Multiple tracks, limited effects | KineMaster offers more sophisticated audio editing |
| Speed Control | Precise control, keyframing possible | Precise control, simpler approach | Both offer similar speed control options |
Export and Sharing Options
So, you’ve painstakingly crafted your masterpiece in either KineMaster or CapCut. Now comes the crucial moment: exporting and sharing your YouTube Short with the world! Let’s dive into the export and sharing options offered by both apps, comparing their strengths and weaknesses. We’ll explore the resolution, file size, and format choices available, and then walk you through the process of directly uploading to YouTube Shorts.
Exporting your video involves choosing the right settings to ensure optimal quality without sacrificing file size. Both KineMaster and CapCut offer a range of options, but their implementation and limitations differ slightly. Understanding these differences is key to maximizing your video’s impact.
Export Resolution, File Size, and Format Choices
KineMaster and CapCut provide various export settings, allowing users to adjust resolution (affecting video clarity), file size (impacting upload and storage space), and format (determining compatibility with different platforms). KineMaster generally offers more granular control over these settings, allowing for higher resolutions and more diverse format choices. CapCut, while simpler to use, might offer fewer options, especially regarding format selection. For example, KineMaster might allow exporting in MP4, MOV, and even some less common formats, whereas CapCut might primarily focus on MP4. The available resolutions and bitrates also influence file size; higher resolutions and bitrates result in larger file sizes but better quality.
Sharing Directly to YouTube Shorts
Sharing directly to YouTube Shorts streamlines the upload process. Let’s Artikel the steps for each app:
KineMaster’s YouTube Shorts Sharing Process
- Once your edit is complete, tap the “Export” button.
- Choose your desired export settings (resolution, quality, etc.).
- After the export is finished, you’ll typically find a share icon. Tap it.
- Select “YouTube Shorts” from the list of available sharing options.
- You’ll likely be prompted to log into your YouTube account (if not already logged in).
- Add a title, description, and relevant hashtags for your Short.
- Tap “Upload” to share your video directly to your YouTube Shorts channel.
CapCut’s YouTube Shorts Sharing Process
- After finalizing your edit, tap the “Export” button.
- Select your preferred export settings.
- Upon completion, locate the share icon.
- Choose “YouTube Shorts” from the sharing options.
- Log in to your YouTube account if needed.
- Add a title, description, and hashtags.
- Tap “Upload” to share directly to your YouTube Shorts feed.
Limitations in Export Quality or Sharing Functionalities
Both apps have minor limitations. Understanding these limitations will help you manage expectations and optimize your workflow.
KineMaster Limitations
- Higher resolution exports can lead to significantly larger file sizes, potentially impacting upload times.
- Some advanced features might only be available in the paid version.
CapCut Limitations
- Fewer export format options compared to KineMaster.
- The direct sharing process might sometimes require additional steps or verification, depending on your device and YouTube account settings.
Effects, Transitions, and Animations
So, we’ve covered the basics – now let’s dive into the fun stuff: effects, transitions, and animations! These are the elements that can truly elevate your YouTube Shorts from good to GREAT, adding personality and polish to your videos. KineMaster and CapCut both offer a decent selection, but their strengths lie in different areas. Let’s see how they stack up.
Both KineMaster and CapCut offer a wide variety of effects, transitions, and animations, but their approaches differ significantly. CapCut leans towards trendy, quick effects perfect for snappy Shorts, while KineMaster provides a more comprehensive, professional-grade toolkit, albeit with a steeper learning curve. The choice ultimately depends on your editing style and the overall look you want to achieve.
Effect Variety and Quality
| App | Effect Types | Quality | YouTube Shorts Examples |
|---|---|---|---|
| CapCut | Filters, Stickers, Text Effects, Glitch Effects, Background Removal, Color Grading | Generally high quality, with a focus on trendy styles. Many effects are easily customizable. | Using a “vintage” filter to give a nostalgic feel to a travel vlog; applying a glitch effect for a modern, edgy aesthetic on a dance video; adding animated stickers to a cooking tutorial for emphasis. |
| KineMaster | Filters, Chroma Key, Blending Modes, Color Correction, Keyframing Animations, Motion Tracking, Audio Effects | High quality, offering more advanced options for precise control and professional-looking results. | Using chroma key to seamlessly integrate a subject against a different background; applying color correction to match footage shot under different lighting conditions; creating a cinematic look with advanced blending modes and color grading. Utilizing keyframe animation to create subtle, professional-looking text animations. |
Ease of Applying and Customizing Effects
Applying and customizing effects in both apps is relatively straightforward, but their interfaces differ significantly. CapCut prioritizes simplicity and ease of use, with intuitive drag-and-drop functionality and pre-set options that require minimal tweaking. KineMaster, on the other hand, provides more granular control over effects, allowing for precise adjustments and fine-tuning, but this comes at the cost of a more complex interface that may take some time to master.
For example, adding a simple filter in CapCut is as easy as selecting it from a list and applying it to the clip. In KineMaster, the same task involves navigating to the effects menu, selecting the filter, and then potentially adjusting its intensity, color temperature, and other parameters. Similarly, creating a subtle animation for text is significantly easier in CapCut through their pre-sets, whereas KineMaster would require more detailed keyframing.
Transition Variety and Quality
Both apps offer a wide variety of transitions, ranging from simple cuts and fades to more complex wipes, zooms, and more stylized transitions. CapCut’s transitions are generally quick and visually appealing, ideal for the fast-paced nature of YouTube Shorts. KineMaster, again, provides a broader range of options, including more sophisticated transitions that are less common in other video editing apps. The quality of transitions in both apps is high, though the overall style differs significantly.
Animation Capabilities
CapCut excels in quick, easy-to-use animations, especially for text and stickers. Its pre-set animation options are plentiful and easy to implement, perfect for adding a touch of dynamism to YouTube Shorts without requiring extensive animation expertise. KineMaster, however, offers far more advanced animation capabilities, including keyframe animation, which provides unparalleled control over movement, opacity, and other parameters. This makes it ideal for creating more complex and nuanced animations, though it requires a greater understanding of animation principles.
Performance and System Requirements
Choosing between KineMaster and CapCut often boils down to more than just features; performance and system requirements play a crucial role in your editing experience, especially when dealing with demanding projects. Let’s delve into how these two apps stack up in terms of resource consumption and potential performance bottlenecks. Understanding these differences will help you make an informed decision based on your device’s capabilities and the complexity of your video projects.
Both KineMaster and CapCut are designed to be relatively lightweight, but their performance can vary significantly depending on the hardware and software of the device. Factors like processor speed, RAM, and storage space all contribute to the smoothness and efficiency of the editing process. High-resolution videos and complex projects with numerous effects and transitions demand more processing power, pushing the limits of even high-end devices.
System Requirements Comparison
The following table Artikels the minimum system requirements for optimal performance with KineMaster and CapCut. Keep in mind that these are minimums; more powerful hardware will lead to a smoother, more responsive editing experience, especially for larger projects.
| Feature | KineMaster | CapCut |
|---|---|---|
| Operating System | Android 5.0 or higher, iOS 11 or higher | Android 7.0 or higher, iOS 11 or higher |
| Processor | Quad-core processor recommended | Dual-core processor recommended |
| RAM | 2GB RAM recommended, 4GB or more preferred | 2GB RAM recommended, 4GB or more preferred |
| Storage | Sufficient storage space for project files and exported videos | Sufficient storage space for project files and exported videos |
Performance Differences with High-Resolution Videos and Complex Projects
When dealing with 4K or higher-resolution videos, or projects involving numerous layers, effects, and transitions, the performance differences between KineMaster and CapCut become more pronounced. KineMaster, being a more feature-rich application, tends to demand more processing power and RAM. Users might experience longer rendering times and occasional lag when working on complex projects. CapCut, while also capable of handling high-resolution videos, generally offers a more streamlined and responsive experience, even with moderately complex projects. However, extremely demanding projects may still cause some performance issues on lower-end devices.
Potential Performance and Stability Issues
Several factors can impact the performance and stability of both KineMaster and CapCut. Understanding these potential issues can help you troubleshoot problems and optimize your workflow.
- Insufficient RAM: Working with large video files or complex projects on devices with limited RAM can lead to slowdowns, crashes, or unexpected behavior. This is especially true for KineMaster, which tends to be more resource-intensive.
- Storage Space Limitations: Running out of storage space can severely impact performance and may prevent the apps from functioning correctly. Ensure you have ample free space on your device.
- Outdated Software: Using outdated versions of the apps or the operating system can lead to compatibility issues, bugs, and performance problems. Regularly update your apps and operating system for optimal performance and stability.
- Device Overheating: Intensive video editing can cause devices to overheat, leading to performance throttling or even app crashes. Take breaks during long editing sessions to allow your device to cool down.
- Background Processes: Having many apps running in the background can consume system resources, impacting the performance of KineMaster and CapCut. Close unnecessary apps before starting an editing session.
Mobile vs. Desktop Availability
Choosing between KineMaster and CapCut for your YouTube Shorts also hinges on where you prefer to edit – your phone or your computer. Both apps cater to mobile editing, but their desktop availability and feature parity differ significantly. This impacts workflow and the overall editing experience, especially for those who prefer a larger screen and more powerful hardware. Let’s delve into the platform availability and feature comparisons.
CapCut’s strength lies in its seamless integration across mobile and desktop platforms, offering a largely consistent editing experience. KineMaster, while primarily a mobile app, also has a desktop version, but with noticeable differences in functionality. This comparison will highlight these variations and help you decide which platform best suits your needs and editing style.
Platform Availability and Feature Comparison
The following table summarizes the platform availability and feature sets for KineMaster and CapCut. Note that feature parity isn’t always guaranteed across platforms for either application.
| App | iOS Mobile | Android Mobile | Desktop (Windows/macOS) |
|---|---|---|---|
| KineMaster | Yes, full feature set | Yes, full feature set | Yes, reduced feature set compared to mobile; some advanced features may be missing or limited. |
| CapCut | Yes, full feature set | Yes, full feature set | Yes, largely consistent feature set with mobile; minor differences may exist in interface elements. |
User Experience Differences: Mobile vs. Desktop
The user experience differs considerably between mobile and desktop versions, especially for KineMaster. On mobile, both apps offer intuitive touch-based interfaces optimized for smaller screens. However, on desktop, the experience diverges.
CapCut’s desktop version maintains a similar feel to its mobile counterpart, providing a smooth transition for users familiar with the mobile interface. The larger screen real estate allows for more precise editing and a more comfortable workflow, particularly for projects involving intricate details or multiple layers. Keyboard shortcuts can significantly enhance productivity.
KineMaster’s desktop version, while functional, presents a less streamlined experience. Some users report a less intuitive interface compared to the mobile app. The feature reduction compared to the mobile version can also be frustrating for users accustomed to the full range of tools available on their phones. The lack of full keyboard shortcut support further diminishes the desktop experience.
Cost and Subscription Models
Choosing between KineMaster and CapCut often comes down to budget and needs. Both offer free versions, but their paid options unlock different levels of functionality. Understanding their pricing models is key to making an informed decision for your YouTube Shorts creation. Let’s break down the costs and what you get for your money.
Both KineMaster and CapCut employ a freemium model, offering a basic free version with limitations and a paid subscription for expanded features. However, the specifics of these models differ significantly, impacting the overall value proposition for different users.
Pricing Comparison
The following table summarizes the pricing models of KineMaster and CapCut. Note that pricing can change, so it’s always best to check the app stores for the most up-to-date information.
| Feature | KineMaster | CapCut |
|---|---|---|
| Free Version | Available with watermark and limited features. | Available with full feature set, but with occasional ads and watermarks on exported videos. |
| Subscription Model | Monthly and annual subscriptions available, offering watermark removal, access to premium assets, and more advanced features. | No subscription model; ads and watermarks can be removed through in-app purchases on a per-video basis. |
| Pricing (Approximate) | Monthly: $4.99-$9.99, Annual: $39.99-$59.99 (depending on platform and offer) | Watermarks and ads removal: Varies depending on video length and selected features. |
Value Proposition of Each App’s Pricing Model
KineMaster’s subscription model provides a consistent, predictable cost for access to all its features. This is ideal for serious creators who rely on the app regularly and want a seamless workflow without interruptions from watermarks or ads. The annual subscription offers better value compared to monthly payments. CapCut’s model, on the other hand, offers flexibility. Users only pay for watermark/ad removal when needed, making it suitable for occasional users or those with tighter budgets. However, the per-video cost can add up for frequent creators.
Limitations of Free Versions
Both apps’ free versions have limitations. Understanding these limitations is crucial for determining whether a paid subscription is necessary for your needs.
- KineMaster: The free version adds a watermark to exported videos, restricts access to premium assets (like fonts and effects), and may have limitations on export resolutions.
- CapCut: The free version includes ads and a watermark on exported videos. While it offers a wide array of features, the visual branding and occasional interruptions might be undesirable for professional-looking content.
Detailed FAQs
Can I use KineMaster or CapCut on a computer?
CapCut has a desktop version; KineMaster is primarily mobile but offers some desktop functionality via a subscription.
Which app has better audio editing capabilities?
KineMaster generally offers more advanced audio editing features, including multi-track audio mixing.
Are there watermarks on exported videos?
Both apps might have watermarks in free versions; paid versions usually remove them.
Which app is better for beginners?
CapCut’s simpler interface makes it more beginner-friendly, while KineMaster’s power requires more learning.
What about exporting in 4K?
Both apps support 4K export, but this may be limited in free versions or require a subscription.